
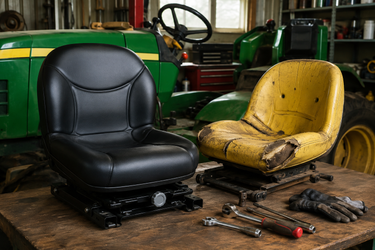
How to Replace a Tractor Seat: Step-by-Step Installation Guide
Replacing a tractor seat is usually a straightforward task that most equipment owners can complete with basic hand tools in less than an hour. The key to a successful tractor seat replacement is selecting a replacement tractor seat that matches your machine's mounting pattern, dimensions, suspension system, and safety switch configuration. Once you've confirmed compatibility, the installation process mainly involves removing the old seat, inspecting the mounting base, installing the new seat, and testing everything before returning to work.
An old or damaged tractor seat is more than just an inconvenience. Worn cushions, loose mounting points, broken suspension components, or faulty operator presence switches can reduce comfort, increase fatigue, and even affect safe machine operation. Research on agricultural ergonomics has shown that prolonged exposure to poor seating support and whole-body vibration can contribute to operator discomfort and lower productivity during long working hours.
Fortunately, learning how to replace a tractor seat doesn't require advanced mechanical skills. Whether you're installing a standard fixed seat or a suspension seat, following the correct steps helps ensure a secure fit and comfortable operation. Before you begin, however, it's essential to verify that your new seat is actually compatible with your tractor. Even a so-called universal model may require careful measurement before installation.
When Is It Time to Replace a Tractor Seat?
Not every damaged seat needs immediate replacement, but several warning signs indicate it's time to consider a tractor seat replacement. Replacing a worn seat early can improve operator comfort while helping maintain safe equipment operation.
Common signs include:
- Torn or cracked seat upholstery that exposes the cushion to moisture.
- Seat foam that has collapsed and no longer provides proper support.
- Excessive movement or wobbling caused by worn mounting hardware.
- Suspension systems that no longer absorb vibration effectively.
- Damaged or malfunctioning operator presence safety switches.
- Increasing back pain or discomfort after extended periods of driving.
- Visible rust or structural damage to the seat frame.
Ignoring these problems can make daily operation less comfortable and may eventually affect productivity. If you're unsure whether your current seat has reached the end of its service life, our guide on When Should You Replace a Tractor Seat? explains the most common warning signs and what to inspect before purchasing a replacement.
Choose the Right Replacement Tractor Seat Before Installation
The most important part of how to replace a tractor seat actually happens before any tools come out. Selecting the correct replacement tractor seat greatly reduces installation problems and helps avoid costly returns or modifications.
Check the Mounting Hole Pattern
Start by measuring the mounting hole spacing on your existing seat or tractor platform. Bolt patterns vary significantly between manufacturers and tractor models.
Even if a product is described as a universal seat, always compare the measurements with the manufacturer's specifications before purchasing.
Measure Seat Width, Depth, and Height
Overall dimensions affect much more than appearance.
A seat that is too wide may interfere with nearby controls or fenders, while a seat that sits too high can change the operator's driving posture and visibility. Proper dimensions also ensure comfortable access to pedals and steering controls.
Verify the Weight Capacity
Every seat is designed to support a specific operating load.
Choosing a seat with an appropriate weight rating helps maintain cushion support, suspension performance, and long-term durability.
Compare Slide Rail Position
If your tractor uses adjustable slide rails, check whether the new seat includes compatible rails or whether the original rails can be transferred.
Incorrect slide rail positioning may limit adjustment range or prevent proper installation.
Check Suspension Height
Many modern tractors use either mechanical or air suspension systems to reduce vibration.
Before you install a tractor seat, compare the suspension height of both seats. Significant differences may affect operator comfort, steering position, or available headroom.
Confirm Armrest Clearance
If your new seat includes armrests, ensure there is adequate clearance around control levers, hydraulic controls, and cab doors.
A comfortable seat should improve operation—not restrict it.
Verify Safety Switch and Wiring Compatibility
Many tractors include an operator presence safety switch beneath the seat.
Before purchasing a replacement tractor seat, confirm that the electrical connector, wiring layout, and mounting position are compatible with your machine. If the seat doesn't include the required switch, determine whether the original component can be transferred safely.
Remember: Universal Doesn't Always Mean Guaranteed Fit
Many equipment owners assume that buying a universal seat guarantees compatibility.
In reality, "universal" usually means the seat supports several common mounting patterns—not every tractor model. Mounting hole spacing, suspension height, slide rails, and electrical connections can still vary considerably.
For a more detailed explanation, read our article on Universal Tractor Seats: Are They Really Compatible?, which discusses common compatibility misconceptions and what measurements should always be checked before purchasing.
Tools You May Need
Most tractor seat installation projects require only basic workshop tools. However, tractors equipped with electrical safety switches or suspension assemblies may require a little extra care during removal and installation.
Before starting, gather the following items:
- Socket wrench or complete wrench set
- Screwdriver
- Measuring tape
- Protective work gloves
- Penetrating lubricant or rust remover
- Cleaning cloth or shop towels
- Small wire brush for removing rust and debris
- Phone or camera to photograph wiring before disconnecting electrical connectors
Having everything prepared beforehand makes the installation process smoother and reduces the chance of losing hardware or forgetting how electrical connectors were originally installed.
In the next section, we'll walk through how to replace a tractor seat step by step, from safely parking the tractor to testing your new seat before returning to work.
Step-by-Step Guide to Replacing a Tractor Seat
Although tractor models vary by manufacturer and application, the basic process of tractor seat installation is generally the same. Taking your time during each step helps prevent alignment problems, protects electrical components, and ensures your replacement tractor seat performs as intended.
Step 1: Park the Tractor Safely
Before you replace a tractor seat, park the tractor on a level, stable surface where it cannot roll or shift during the installation.
Turn off the engine, engage the parking brake, lower any attached implements to the ground, and remove the ignition key. If your tractor has an operator presence switch or other electrical connections beneath the seat, consult the owner's manual and disconnect the battery if recommended by the manufacturer.
Starting with a safe work environment reduces the risk of accidental machine movement and protects sensitive electrical systems.
Step 2: Inspect the Existing Seat Mounting
Before removing any hardware, spend a few minutes examining how the current seat is installed.
Different tractors use different mounting methods. Some seats bolt directly to the mounting platform, while others are attached to slide rails or mechanical suspension bases. Premium models may also include air suspension systems or integrated shock absorbers.
Understanding the mounting design before disassembly makes the tractor seat replacement process much easier and helps you determine which components can be reused with the new seat.
Take note of:
- Mounting bracket location
- Bolt positions
- Slide rail orientation
- Suspension assembly
- Electrical connectors
- Seat adjustment mechanisms
Observing these details now can save considerable time later during reassembly.
Step 3: Take Photos Before Disconnecting Wiring
If your tractor seat includes an operator presence safety switch, seat sensor, or other electrical wiring, take several clear photos before disconnecting anything. Capture images from multiple angles so you can easily identify each connector during reinstallation. If several wires look similar, consider labeling them with masking tape before removal. This simple step is often overlooked, yet it can prevent wiring mistakes that may affect machine safety systems or require unnecessary troubleshooting later.
Step 4: Remove the Old Tractor Seat
Once everything has been documented, begin removing the mounting bolts and fasteners.
Use the correct socket or wrench size to avoid damaging bolt heads. Older tractors often have rusted hardware, so applying a penetrating lubricant several minutes before loosening the bolts can make removal much easier.
As each fastener is removed, place it in a container to prevent loss. If the bolts, washers, and brackets remain in good condition, they may be reused during tractor seat installation, provided the new seat manufacturer allows it.
After all hardware has been removed, carefully lift the old seat away from the mounting platform. Suspension seats may be heavier than expected, so lifting assistance may be helpful.
Step 5: Clean and Inspect the Mounting Base
With the old seat removed, take the opportunity to inspect the mounting area thoroughly.
Remove accumulated dirt, crop residue, grease, and rust using a brush and cleaning cloth. A clean mounting surface allows the new seat to sit evenly and helps ensure accurate bolt alignment.
While cleaning, inspect the following components carefully:
- Mounting plate
- Seat brackets
- Slide rails
- Suspension base
- Bolt holes
- Welded joints
Look for cracks, bent metal, excessive corrosion, or loose mounting points. Installing a new seat onto damaged mounting hardware can reduce stability and shorten the service life of the entire seating system.
Step 6: Compare the New Seat with the Old Seat
Before you install a tractor seat, place the old and new seats side by side for comparison.
Even when the product is advertised as a universal replacement, small differences may affect installation or operator comfort.
Compare the following features:
- Mounting hole spacing
- Overall seat width
- Seat depth
- Cushion height
- Slide rail position
- Suspension height
- Armrest location
- Safety switch connector
- Wiring length
This comparison allows you to identify any potential issues before permanently mounting the new seat.
If an adapter bracket is required, it's much easier to discover this now than after partially completing the installation.
Step 7: Install the New Tractor Seat
Once compatibility has been confirmed, position the replacement tractor seat on the mounting platform.
Align all mounting holes carefully before inserting the bolts.
Rather than tightening one bolt completely at a time, install every bolt loosely first. This allows minor adjustments so the seat can be centered correctly. After all bolts have been started by hand, gradually tighten them in stages using an alternating pattern. Even tightening distributes pressure evenly across the mounting plate and helps prevent the seat from sitting crooked. Avoid overtightening unless torque specifications are provided by the tractor or seat manufacturer. Taking a few extra minutes during this stage helps ensure a secure and professional tractor seat installation.
Step 8: Reconnect the Safety Switch or Wiring
If your tractor uses an operator presence switch or seat sensor, reconnect each electrical connector according to the photos taken earlier or the manufacturer's instructions.
After reconnecting the wiring, inspect cable routing carefully.
Ensure that wires are not stretched, pinched, or positioned where slide rails, suspension mechanisms, or moving seat components could damage them during adjustment.
Proper cable management not only protects electrical components but also helps maintain the reliability of important safety systems.
If cable clips or protective sleeves were removed during disassembly, reinstall them before proceeding.
Step 9: Test the Seat Before Use
The final step of how to replace a tractor seat is performing a complete functional inspection before operating the tractor.
Start by gently rocking the seat to confirm that it is firmly mounted with no noticeable movement.
Next, test every adjustable feature, including:
- Forward and backward slide rails
- Reclining mechanism, if equipped Suspension movement
- Seat height adjustment
- Armrests
- Lumbar support, if available
If your tractor includes an operator presence safety switch, verify that it functions correctly according to the equipment manufacturer's instructions.
Finally, sit in the seat and check your driving position.
Confirm that you can comfortably reach the steering wheel, pedals, gear selectors, hydraulic controls, and other operating levers without excessive stretching or awkward posture.
Only after every function has been tested should the tractor be returned to normal operation.
A careful inspection at the end of the tractor seat replacement process provides confidence that the new seat is secure, comfortable, and ready for long hours in the field.
Common Tractor Seat Replacement Mistakes to Avoid
Even after learning how to replace a tractor seat, it's still possible to make small mistakes that lead to poor fit, reduced comfort, or additional repair work. Avoiding the following issues can make your tractor seat replacement smoother and help extend the life of your new seat.
| Common Mistake | Why It Matters |
|---|---|
| Buying a seat without measuring the mounting holes | Bolt patterns vary between tractor models. Incorrect spacing may prevent installation altogether. |
| Assuming every universal tractor seat will fit | "Universal" usually means compatibility with several common mounting patterns—not every tractor. Always verify dimensions before purchasing. |
| Ignoring safety switch compatibility | An incompatible operator presence switch may affect normal machine operation or require additional modifications. |
| Forgetting to check seat height | A seat that sits too high or too low can affect visibility, pedal reach, and overall driving comfort. |
| Tightening bolts before full alignment | Fully tightening one side first can make the remaining holes difficult to align, resulting in a crooked or unstable installation. |
| Leaving wiring near moving parts | Unsecured wiring may become pinched by slide rails or suspension components, potentially causing electrical issues. |
| Not testing the seat before operation | Failing to check stability, adjustment functions, and the safety switch may leave installation problems unnoticed until the tractor is in use. |
One of the most common mistakes is assuming every universal seat is identical. Before purchasing, it's worth learning more about compatibility requirements. Our article, Universal Tractor Seats: Are They Really Compatible?, explains why measurements such as mounting hole spacing, seat dimensions, and suspension height are just as important as the "universal" label.
Final Safety Checklist
Before putting your tractor back into service, complete this quick inspection.
✔ All mounting bolts are fully tightened.
✔ The seat is firmly secured with no wobbling or excessive movement.
✔ Slide rails lock properly in every adjustment position.
✔ Suspension components move smoothly without unusual noise.
✔ The operator presence safety switch functions correctly.
✔ Wiring is securely connected and routed away from moving parts.
✔ The steering wheel, pedals, and control levers are easy to reach.
✔ The seating position feels stable, comfortable, and provides clear visibility.
Completing this checklist only takes a few minutes, but it helps ensure your tractor seat installation is both safe and reliable.
How to Keep Your New Tractor Seat in Good Condition
A quality replacement tractor seat can provide years of dependable service with regular care. Simple maintenance not only extends the life of the seat but also helps preserve operator comfort throughout every season.
Clean the Seat Regularly
Dust, mud, fertilizer, and crop residue can gradually wear down upholstery materials. Wipe the seat with a soft cloth and use cleaning products that are suitable for the seat's material. Avoid harsh chemicals that may damage vinyl or fabric surfaces.
Minimize Long-Term Exposure to Sun and Rain
Whenever possible, park the tractor under cover or inside a storage building. Continuous exposure to ultraviolet light, rain, and snow can accelerate fading, cracking, and material aging.
If indoor storage isn't available, using a protective seat cover can help reduce weather-related wear.
Recheck Mounting Bolts After Initial Use
Following a tractor seat replacement, inspect the mounting hardware after the first few days of operation.
Normal vibration may cause newly installed bolts to settle slightly. Retightening them according to the manufacturer's recommendations helps maintain a secure installation.
Inspect High-Wear Components
Periodically examine the seat cover, foam cushion, slide rails, adjustment mechanisms, and suspension system.
Early detection of wear allows small issues to be corrected before they become more expensive repairs.
Lubricate Moving Parts When Necessary
If your seat includes slide rails or mechanical suspension components, apply lubricant according to the manufacturer's maintenance recommendations.
Proper lubrication helps maintain smooth adjustment and reduces unnecessary wear on moving parts.
With routine inspection and cleaning, most high-quality tractor seats can continue providing reliable support through years of demanding agricultural work.
Conclusion
Knowing how to replace a tractor seat is a valuable maintenance skill that can improve comfort, reduce operator fatigue, and help maintain safe equipment operation. By choosing a compatible replacement tractor seat, following each installation step carefully, and completing a thorough safety inspection before use, you can complete a successful tractor seat replacement with confidence.
If you're looking for a dependable replacement, it's worth choosing a manufacturer that offers multiple mounting options, suspension configurations, and seating solutions for different types of equipment. Lumina Seats provides a wide range of tractor seats, mower seats, forklift seats, suspension kits, and other heavy-duty seating products designed for agricultural and industrial applications, making it easier to find a seating solution that matches your equipment and working environment.
Frequently Asked Questions
Can I replace a tractor seat myself?
Yes. In most cases, learning how to replace a tractor seat requires only basic mechanical skills and common hand tools. As long as the new seat is compatible with your tractor and you follow the correct installation steps, many owners can complete the job in 30 to 60 minutes.
How long does tractor seat installation usually take?
A standard tractor seat installation typically takes between 30 minutes and one hour. Additional time may be needed if bolts are heavily rusted, electrical wiring must be transferred, or suspension components require adjustment.
Are universal tractor seats really universal?
Not completely. Most universal seats are designed to fit multiple mounting patterns, but compatibility still depends on measurements such as mounting hole spacing, seat dimensions, suspension height, slide rail location, and safety switch configuration. Always verify these specifications before purchasing.
Should I replace the suspension together with the seat?
If the suspension system shows signs of excessive wear, poor shock absorption, or visible damage, replacing both the seat and suspension at the same time can improve comfort and reduce vibration. Keeping worn suspension components while installing a new seat may limit the overall improvement in ride quality.